The Pre-Purchase Checklist That Raises Conversion Rate Fast
Turn the strategy into creatives
Create Meta ads for your product
Paste your product page. ADEN'S LAB turns the offer, audience, and positioning into complete ready-to-use Meta static ads.
Free to try No prompt writing

If your ad campaigns aren't delivering results, chances are you're missing the basics. Over 70% of campaigns fail due to issues like broken tracking, slow landing pages, or targeting the wrong audience. These small errors quietly drain your budget, but fixing them upfront can make a huge difference. Here's what you need to focus on:
- Set up tracking properly: Ensure your Meta Pixel and Conversion API (CAPI) are working together to provide accurate data.
- Choose the right conversion events: Use Meta's Standard Events and prioritize high-value actions like purchases.
- Fix your landing page: Align it with your ad message, optimize for mobile, and ensure it loads in under 3 seconds.
- Build better ad content: Use simple, engaging visuals and test bold ideas to stand out in feeds.
- Target smarter: Segment audiences by their intent and exclude recent buyers to avoid wasting ad spend. You can further refine performance by scheduling ads for peak times to maximize ROAS.
Skipping these steps is like pouring money into a leaky bucket. With accurate tracking, fast pages, and clear targeting, you can stop wasting money and improve campaign profitability.
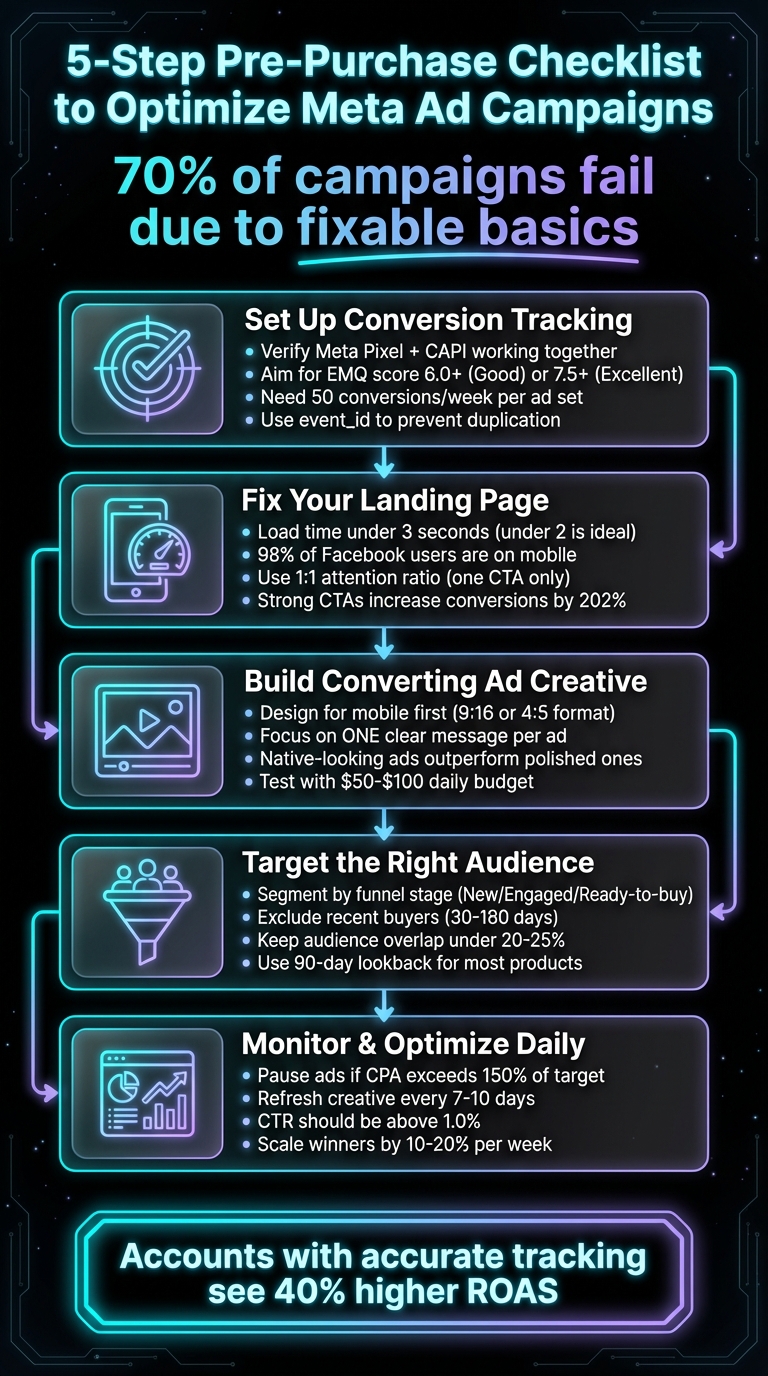
5-Step Pre-Purchase Checklist to Optimize Meta Ad Campaigns
Revealing My Secret Meta Ad Account Optimization Process
Put the playbook to work
Apply this playbook to your page
Paste your website and the Lab will turn the strategy you are reading into a ready-to-test ads.
Free to try No prompt writing
1. Set Up Conversion Tracking Correctly
Misconfigured tracking can drain your budget fast. If your data isn't accurate, the algorithm won’t know who to target without proper data signals. Even campaigns with strong creative and compelling offers can fail due to a single tracking issue, though you can automate Meta ad production to ensure your creative workflow remains efficient.
Spending just 20 minutes verifying your setup could save you thousands. Here's a checklist to go through before launching.
Check That Your Meta Pixel Is Working
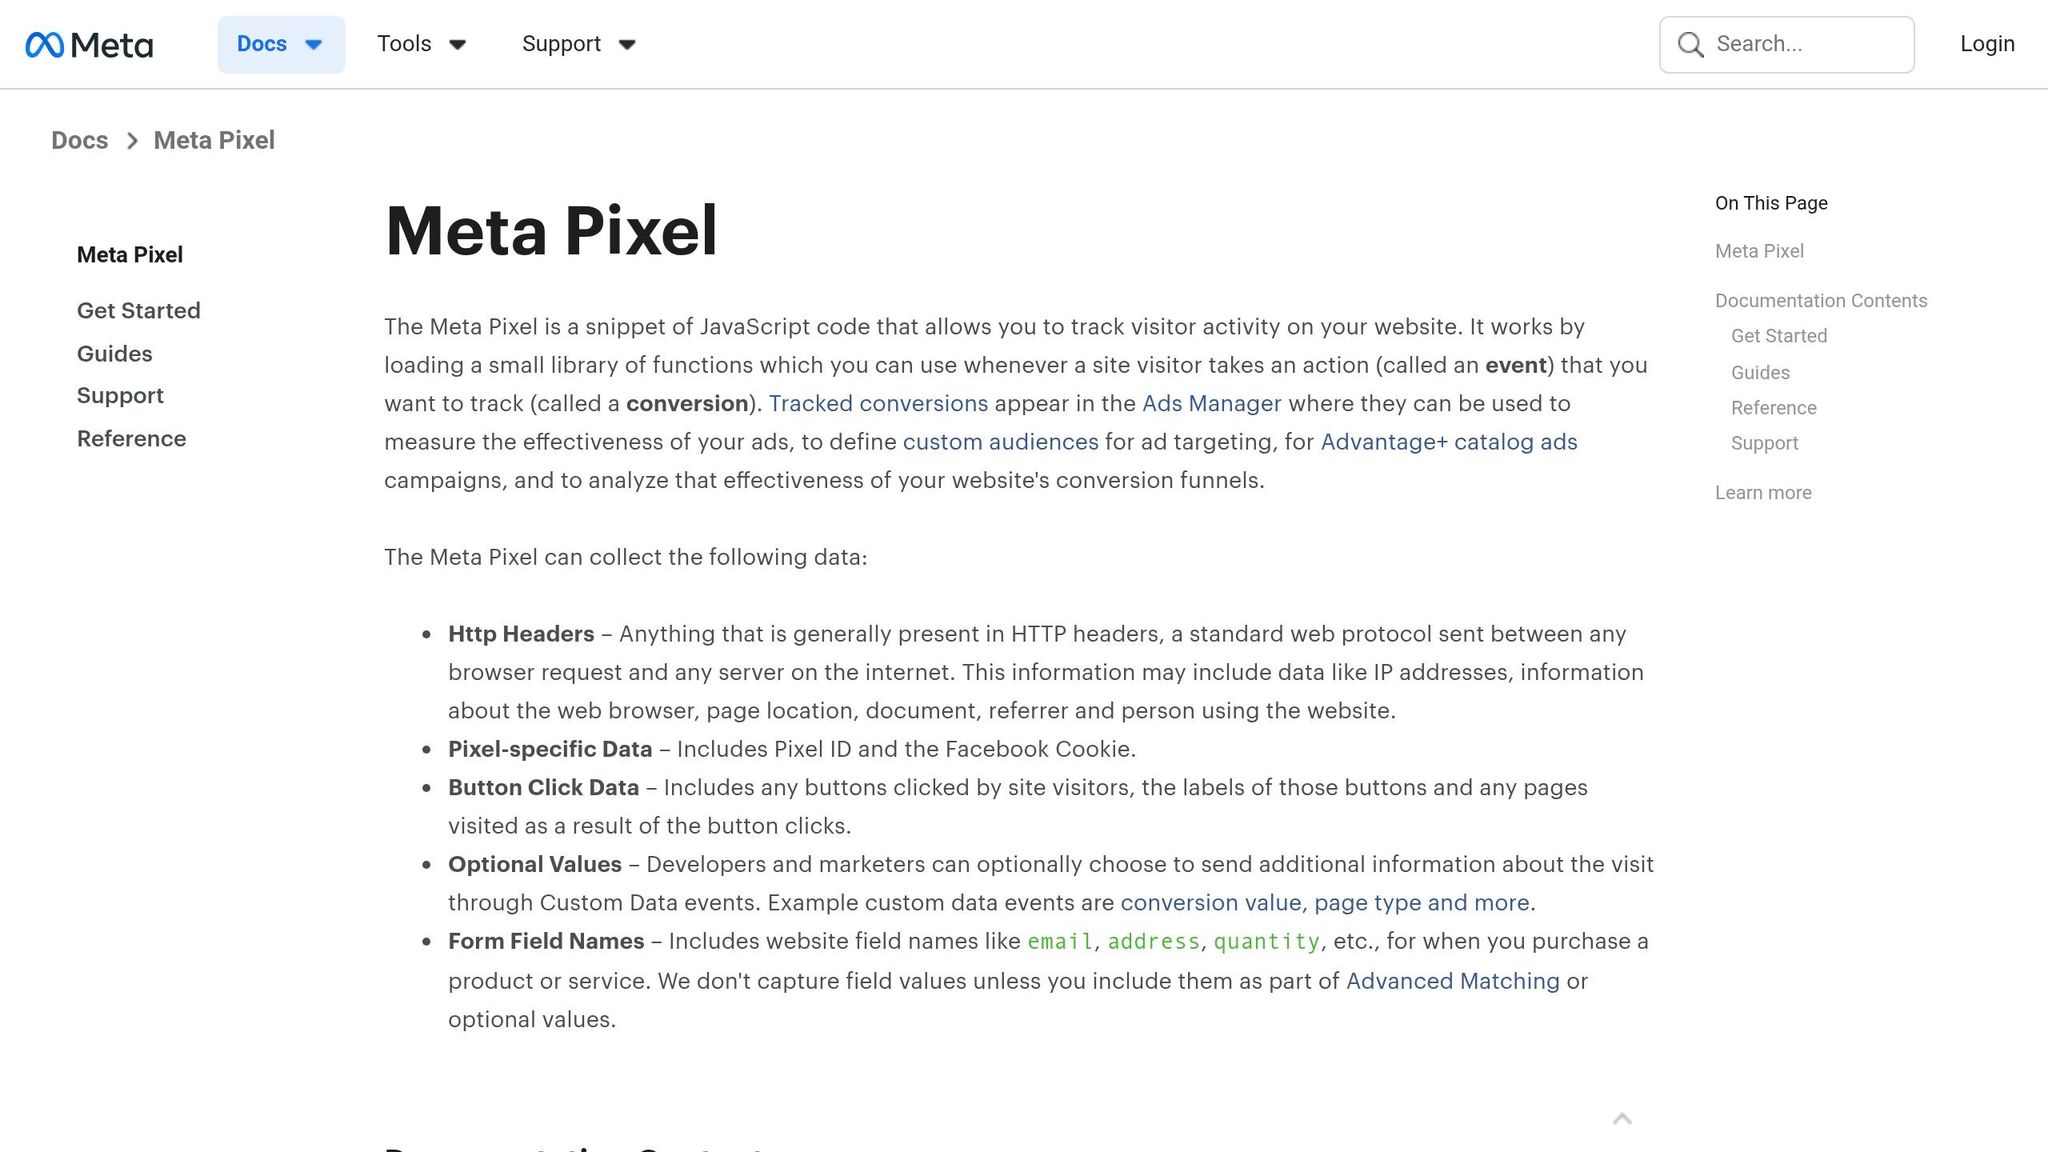
Head over to Meta's Events Manager and use the Test Events tool. This handy feature shows real-time activity on your site, displaying events triggered as "Browser" (via the Pixel) and "Server" (via the Conversions API, or CAPI). Running both is crucial - they work together to boost data match rates by 20-30%.
Check your Event Match Quality (EMQ) score in Events Manager. A score of 6.0+ is "Good", and 7.5+ is "Excellent". If your score is low, it means Meta isn’t receiving enough customer data to match users accurately. You can improve this by passing hashed data like email, phone number, and external_id through your CAPI setup.
Be on the lookout for event duplication. If your conversion numbers seem unusually high, it might mean both your Pixel and CAPI are firing without proper deduplication. Use the event_id parameter to assign unique identifiers to each action, so Meta can merge these signals correctly.
Choose the Right Conversion Events
Not all events are created equal. Meta gives preference to Standard Events - like Purchase, Lead, and AddToCart - because they’re easier for the algorithm to identify. For e-commerce, prioritize your event hierarchy like this: Purchase first, followed by Initiate Checkout, Add to Cart, and then View Content.
Keep in mind that Meta needs roughly 50 conversions per week per ad set to optimize effectively. If your bottom-funnel event (like Purchase) isn’t hitting this volume, consider optimizing for a mid-funnel event like AddToCart or InitiateCheckout. The algorithm needs a solid data set to learn.
Under Aggregated Event Measurement (AEM), you can prioritize up to eight events, and you’ll need to rank them manually in Events Manager. Put your highest-value action - usually Purchase - at the top. For lead generation, switching from "Maximize Number of Leads" to "Maximize Number of Conversion Leads" can reduce your cost per quality lead by about 19%.
"Meta optimizes exactly for what you tell it to optimize for. Choose wisely, and the algorithm becomes your most powerful growth lever." – ROASPIG
Once your conversion events are set, the next step is syncing your CRM data for deeper insights.
Confirm Your CRM Is Syncing Data
If you’re managing leads or working with a sales funnel, your CRM must sync seamlessly with Meta. This connection allows you to feed downstream conversion data - like Sales Qualified Leads or Closed Deals - back into the algorithm, helping it find more prospects similar to your best customers.
Start by accepting Meta’s Custom Audience Terms. Missing this step will block the sync. Then, ensure your CRM transfers hashed data (email, phone, name) to Meta. You’ll need at least 100 matched members for the synced audience to be usable in campaigns.
Use the Test Events tool to verify that CRM signals are coming through in real time. If you’re using Salesforce with the Lead Capture App, make sure to remove the "FB-" prefix on External Lead IDs using a formula field - Meta won’t recognize them otherwise. Also, check your CRM’s activation hub regularly for statuses like "Warning" or "Pending", which could signal processing problems.
Focus on syncing key milestones - like SQL or Closed Won - rather than overwhelming the system with too much data. Clean, focused data always outperforms noisy, irrelevant data.
2. Fix Your Landing Page Before Spending a Dollar
Once your tracking is in place, the next step is ensuring your landing page delivers what your ad promises. Even the most perfectly crafted ads will waste your budget if your landing page doesn’t do its job. Using AI tools for Meta ads can help optimize your creative, but the post-click experience remains critical. In fact, over 70% of ad campaigns fail before they even get off the ground because of overlooked basics like landing page optimization. Your tracking might capture the click, but it’s the landing page that turns that click into a conversion.
For example, if your ad promotes "handcrafted dresses", don’t send users to a generic homepage. Instead, direct them straight to the specific collection of dresses mentioned in the ad. This alignment - called message match - can make or break your campaign. The headline on your landing page should reflect the exact promise made in your ad to keep users engaged.
Make Your Message and CTA Stand Out
Your landing page has one primary goal: to drive visitors toward taking a single, clear action. Stick to one main call-to-action (CTA) button and avoid confusing users with multiple options. Having too many choices can reduce your conversion rates by as much as 266%.
To build trust and encourage action, place reassurance elements like customer testimonials, security badges, or refund policies near your CTA. Personalizing your CTA can also make a big difference - strong, specific CTAs have been shown to increase conversions by over 202% compared to generic ones. For instance, instead of a bland "Submit", try something more engaging, like "Start My Free Trial" or "Get My Discount Now."
"Your landing page determines whether the click becomes a conversion." – Audhi Palpandian
Optimize for Speed and Mobile Users
The majority of your paid traffic - especially from platforms like Meta - will come from mobile devices. In fact, over 98% of Facebook’s active users access it via mobile. If your landing page takes longer than 3 seconds to load, more than half of your visitors will leave before they even see your offer.
Meta’s algorithm doesn’t take kindly to slow-loading pages. It penalizes them with lower ad relevance scores, higher costs per click, and reduced reach. To stay competitive, aim for a load time of under 2 seconds on mobile. Tools like Google PageSpeed Insights or GTmetrix can help you measure performance. To speed things up, compress images (use WebP format), and simplify your code by minifying it.
Also, design your page with mobile users in mind. Make sure your CTA button is easy to tap, and keep forms short by only asking for essential details like a name and email. Features like auto-fill can also reduce friction and improve the user experience.
Eliminate Distractions That Compete With Your Goal
Every unnecessary link, pop-up, or menu item on your landing page is an opportunity for visitors to leave without converting. To keep users focused, remove anything that doesn’t directly support your conversion goal.
Avoid cluttering your page with long paragraphs, heavy visuals, or walls of text. Instead, use bullet points, short sections, and plenty of white space to guide users’ attention toward your CTA. Pop-ups, especially on mobile, can disrupt the flow and should be minimized or removed entirely.
The key is maintaining a 1:1 attention ratio - one primary action per page. If your goal is to get users to download a guide, don’t distract them with requests to subscribe to a newsletter or watch a demo. Focus your entire page on that single, clear objective.
3. Build Ad Creative That Actually Converts
Once your landing page is dialed in, the next hurdle is grabbing attention in the endless scroll of a social media feed. On Meta platforms, your ad competes with everything from vacation photos to memes. The goal isn’t just to make your ad visually appealing - it’s to make it work.
Interestingly, the most effective ads often don’t look like ads at all. Instead, they mimic the casual, unpolished vibe of organic posts. Think of something a friend might share: a quick phone video, real people, and simple text overlays. Overly polished ads can scream "advertisement" and get ignored, while native-looking content blends seamlessly into the feed and draws users in.
Focus on One Clear Message Per Ad
Each ad should communicate one key benefit. Trying to cram multiple features into a single ad only weakens your message. Instead, pick your strongest selling point and build everything around it. For instance, if you’re promoting a productivity app, zero in on a relatable pain point like, "Spending 2 hours in meetings?" and then introduce your solution. When brainstorming new ad copy ideas, avoid making small tweaks to existing ads. Instead, experiment with bold changes to your hook, visuals, or overall angle. Big shifts in creative strategy often yield the best results.
Design for Mobile Screens First
Since most Meta users are on their phones, your ads need to be mobile-friendly. Start by designing vertical formats - such as 9:16 for Reels and Stories or 4:5 for feed posts - to make full use of the screen. This not only prevents awkward cropping but also ensures your ad looks clean and professional.
Keep in mind that many users scroll with their sound off, so your ad should tell its story visually. Use captions, text overlays, and striking visuals to get your message across without relying on audio. Also, avoid placing important text or logos near the edges, as these areas might be covered by on-screen elements. Always preview your ad on a mobile device to catch any formatting issues before it goes live.
Add Social Proof to Your Creative
Social proof is a quick way to build trust. Real customer testimonials and user-generated content (UGC) can make your ads feel more genuine. For instance, a video of someone unboxing your product or explaining how it solved their problem can resonate far more than a scripted ad. Before-and-after visuals are another powerful way to showcase your product’s effectiveness.
If you’re producing static ads in bulk, tools like Aden's Lab can simplify the process. By dropping in your product link, you can generate eye-catching static ads that align with Meta’s algorithm. This approach helps you test multiple creatives quickly while reducing the risk of creative fatigue.
When testing new ads, aim for a broad audience. If your creative only appeals to people already familiar with your brand, it won’t scale effectively. Run separate campaigns with modest daily budgets of $50–$100 to identify winning ads. Once you find a top performer, gradually increase your budget by about 20% every 3–4 days to scale effectively.
4. Target the Right People at the Right Time
Creating the perfect ad or landing page is just the beginning. What really determines success is ensuring your message reaches the right audience at the right moment. Poor targeting can drain your budget fast, but the solution isn’t spending more - it’s refining your audience segmentation.
Your messaging should match where your audience is in their journey. Someone discovering your brand for the first time shouldn’t see the same ad as someone who’s already added items to their cart. Aligning your targeting with intent can boost conversions and lower acquisition costs.
Split Audiences by Funnel Stage
Breaking your audience into three categories - new, engaged, and ready-to-buy - makes your campaigns more effective. Here’s how these groups differ:
- New audiences: These individuals have never interacted with your brand.
- Engaged audiences: They’ve taken actions like visiting your site, watching a video, or liking a post.
- Ready-to-buy audiences: These are high-intent individuals who’ve viewed your pricing page or added items to their cart.
Each group requires tailored messaging. For new audiences, focus on introducing your brand and the problem you solve. Engaged audiences need reassurance of your value and answers to any objections. For ready-to-buy audiences, urgency works best - try offers like "15% off ends tonight" to nudge them toward a purchase.
"Meta doesn't know your business the way you do. It can't tell who's just window-shopping from who's a loyal customer - unless you spell it out for the algorithm." – Vincent, Founder, Chipper
Also, don’t waste ad spend retargeting recent buyers. Exclude anyone who’s converted in the last 30 to 180 days to keep your campaigns efficient and your data clean.
Build Custom Audiences From Your Data
Your own data is far more valuable than Meta’s pre-set interest categories. Use customer information - like emails and phone numbers - to build custom audiences. The Meta Pixel is another powerful tool, especially when you segment website visitors by behavior. For example, someone who visited your pricing page is much more likely to convert than someone who only browsed a blog post.
To improve match rates, upload lists with multiple identifiers. Start with email and phone number, but also include details like city, ZIP code, and gender. The minimum audience size is 100 users from the same country, but larger lists tend to perform better.
Your lookback windows should align with your product’s purchase cycle. For most businesses, 90 days works well for engaged visitors who haven’t yet bought. For existing customers, extend it to 180 days. If you sell products that need regular replenishment - like supplements or soap - shorten the window to 28 or 30 days to catch people when they’re ready to reorder.
Lookalike audiences are another game-changer. Start with a 1% lookalike of your top customers - those with high lifetime value or multiple purchases. Then experiment with 2% and 5% lookalikes to find the right balance between scale and precision. As your pixel gathers more conversion data, these audiences become even more effective.
For example, in 2024, Graham Media Group used location-based custom audiences for a mattress manufacturer. They targeted people near their stores and competitors’ locations, achieving a 3.3% click-through rate - an astonishing 160 times higher than the industry average of 0.02%.
Once your lists are refined, decide whether to go broad or narrow with your targeting.
Know When to Go Broad vs. Narrow
Your targeting strategy should adapt based on your goals. Broad targeting works best when your tracking is solid and your creative is compelling. Meta’s algorithm excels at finding buyers when you provide clean conversion signals. By casting a wider net, you can often achieve better cost efficiency at scale.
Narrow targeting, on the other hand, is ideal when testing new offers, controlling acquisition costs, or managing segmented funnels that require specific budgets. Interest-based targeting can still be useful in the early stages, but it’s not a sustainable approach for scaling.
Keep an eye on audience overlap. If your campaigns overlap by more than 20% to 25%, you risk driving up CPMs and hurting performance. Simplify or merge audiences to avoid this issue.
When testing new creatives, always start with a broad audience. If an ad doesn’t perform well broadly, it likely won’t scale. Test these creatives in a separate campaign with a daily budget of $50 to $100. Once you find a winning ad, scale it gradually - around 20% every 3 to 4 days - to maintain stability.
For managing multiple static ads across segments, tools like Aden’s Lab can automate ad creation to streamline the process. Just drop in your link, get your ads, and launch them on Meta.
5. Watch Performance and Adjust Fast
Launching a campaign is just the start. The real challenge lies in managing it effectively. The difference between a profitable campaign and wasted budget often comes down to how quickly you spot and fix issues. Slow adjustments can drain your budget and weaken your position in the market. Checking your campaign's performance daily - not weekly - can help you catch problems early and avoid unnecessary overspending.
Once your tracking, landing page, and creative assets are in place, your focus should shift to maintaining and improving their performance.
Keep an Eye on These Metrics Daily
Four key metrics can help you gauge your campaign's health: Click-Through Rate (CTR), Cost Per Acquisition (CPA), conversion rate, and Return on Ad Spend (ROAS).
- CTR reflects how well your ad is connecting with your audience. If it’s below 1.0%, it’s a sign your creative isn’t hitting the mark.
- CPA shows how much you’re spending to acquire a customer. During the launch phase, pause any variant that exceeds 150% of your target CPA.
- Conversion rate indicates whether your landing page and offer are compelling enough to drive action.
- ROAS tells you if your ad spend is yielding profits.
For video ads, track the View-Through Rate (VTR) - aim for at least 20% at the 30-second mark. Additionally, monitor ad frequency. If it exceeds 3.0, you risk overexposing your audience, which can lead to creative fatigue. Using real-time dashboards can speed up decision-making by up to 30%, ensuring you stay on top of these metrics daily.
When any of these metrics show signs of trouble, take action immediately.
Pause Underperforming Ads Quickly
The 150% rule is critical: if an ad’s CPA exceeds 150% of your target, pause it right away. Delaying even one day can result in significant wasted spend. During the first 12 hours of testing, allocate 50% of your budget to gather early data. If an ad underperforms after 3–4 days, it’s time to pause it. Avoid letting personal preferences cloud your judgment - ads that don’t deliver results need to go.
Set up automated rules or alerts to pause ads when conversion rates drop more than 5% below your control. To combat ad fatigue, refresh your creative assets every 7–10 days. Campaigns that rotate at least three creative sets can see an 8–12% increase in CTR over a month. If you’re managing a large volume of ads, tools like Aden's Lab can help you quickly generate new creatives without waiting on designers.
Pausing ineffective ads gives you the opportunity to refine your targeting and creative approach.
Optimize Targeting and Creative with Data
After eliminating underperforming ads, focus on improving and scaling the ones that work. Identify what’s driving success - whether it’s the hook, the offer, or the format. For example, if an ad captures attention but struggles with conversions, keep the engaging element and test a new message or call-to-action.
Scale winning ads gradually, increasing budgets by 10–20% per week to avoid disrupting the algorithm, which could reduce ROAS by 5%. Test bold creative changes through separate A/B campaigns with daily budgets of $50–$100, allowing 3–4 days for results before making decisions. Avoid introducing new ads into high-performing campaigns to maintain stability. Bold A/B tests can improve CTR by 8–10%, so focus on significant changes rather than minor tweaks.
To measure performance, use the lift formula:
(Conversion Rate Variant - Conversion Rate Control) / Conversion Rate Control × 100. This approach ensures precise comparisons between different ad versions.
Conclusion: This Checklist Stops Expensive Mistakes Before They Happen
Skipping over the basics can lead to costly errors that quietly drain your ad budget. Did you know that over 70% of ad campaigns fail before they even launch? The reason? Missing foundational elements. Running ads without this checklist in place is like pouring money into a bucket full of holes. Sure, you might see clicks and traffic, but without the right setup, conversions will lag behind.
This checklist isn’t about chasing perfection - it’s about tackling the specific problems that eat away at your budget. Think of false conversions caused by broken tracking, high bounce rates from sluggish landing pages, creative fatigue due to limited ad variations, or algorithms targeting the wrong audience because you chose Traffic instead of Sales. These seemingly small issues add up, quietly increasing your cost per acquisition over time.
Here’s the good news: accounts with accurate conversion tracking see an average 40% boost in ROAS. That improvement doesn’t come from flashy tricks or shortcuts; it’s the result of getting the fundamentals right. This means setting up both the Pixel and Conversions API (CAPI), selecting the correct conversion event, ensuring your landing page loads in under three seconds, and testing your creative on mobile before spending a single dollar. Spend a few hours now to avoid wasting thousands later.
Take this checklist step by step. Even the tasks that seem obvious or tedious are essential. Accurate tracking, clear objectives, and engaging creative all work together to create a strong foundation. With clean data and the right inputs, algorithms can deliver buyers. Without them, you’ll just attract clickers. Give the system the tools it needs, and it will find the right audience for you.
Once you’ve nailed the basics, scaling winning creatives becomes easier. Efficient creative production is key to keeping up with testing and avoiding ad fatigue. If you’re struggling to produce enough assets, tools like Aden's Lab can generate fresh static Meta ads from a single product link - no prompts or design briefs needed. Just drop the link and go. But remember, even the most eye-catching creative won’t save a campaign if your tracking is broken or your landing page takes too long to load. Build a solid foundation, and every dollar you spend will work harder for you.
FAQs
How do I know my Pixel and CAPI aren’t double-counting purchases?
To prevent double-counting purchases when using both Pixel and Conversions API (CAPI), it’s crucial to set them up properly and test them together. Use Meta’s Event Manager and the Test Events tool to verify that event tracking is working as expected. Make sure to pass unique identifiers - like email, phone number, or external_id - with every event. These identifiers help Meta deduplicate signals effectively. Regular testing is key to maintaining accurate reporting and avoiding duplicate purchase tracking.
What should I optimize for if I can’t get 50 purchases a week?
If your campaigns aren't reaching 50 purchases per week, shift your focus to reducing your cost per purchase and give your ads more time to optimize. It's better to aim for efficiency rather than rushing to achieve high conversion numbers right away. Forcing high volume too soon can result in unnecessary spending. Allow the algorithm to collect data over time, which will help improve performance steadily.
What landing page changes boost conversion rates the fastest?
The quickest way to improve conversion rates is by focusing on changes that enhance clarity, minimize friction, and emphasize value. Start by simplifying your offer so it’s easy to understand, ensuring your call-to-action is highly visible, and refining the user experience to make interactions smoother. These straightforward adjustments tackle typical barriers that stop users from taking action.
Your next ad batch starts here
Finish with a ready-to-test ad batch
Paste your website to generate static creatives. Drop the link → get ads in about 90 seconds → upload them to Meta → scale.
Free to try No prompt writing