How to Build Retargeting Audiences for Meta Ads
Turn the strategy into creatives
Create Meta ads for your product
Paste your product page. ADEN'S LAB turns the offer, audience, and positioning into complete ready-to-use Meta static ads.
Free to try No prompt writing

Retargeting on Meta Ads is all about reconnecting with users who’ve already shown interest in your brand. These are people who visited your website, browsed products, or started checkout but didn’t complete a purchase. Since they’re already familiar with your business, they’re 70% more likely to convert compared to cold audiences. Retargeting campaigns can also deliver 3–5x higher conversion rates and reduce acquisition costs by up to 70%.
Here’s how you can set up effective retargeting audiences:
- Install the Meta Pixel: Track user actions like product views, cart additions, and purchases. Combine it with the Conversions API for better accuracy, especially post-iOS 14.5 privacy updates.
- Create Custom Audiences: Segment users based on website activity (e.g., cart abandoners, product viewers) or upload customer lists for tailored targeting.
- Segment by Behavior: Divide audiences into tiers (e.g., cart abandoners, site visitors) and match ad messaging to their intent level.
- Exclude Converted Users: Avoid wasting ad spend by excluding recent purchasers from your campaigns.
- Track and Adjust: Monitor key metrics like frequency, CTR, and ROAS to refine your campaigns and improve results.
Retargeting gives you a second chance to turn browsers into buyers. With proper tracking, segmentation, and campaign structure, you can maximize conversions while keeping costs low.
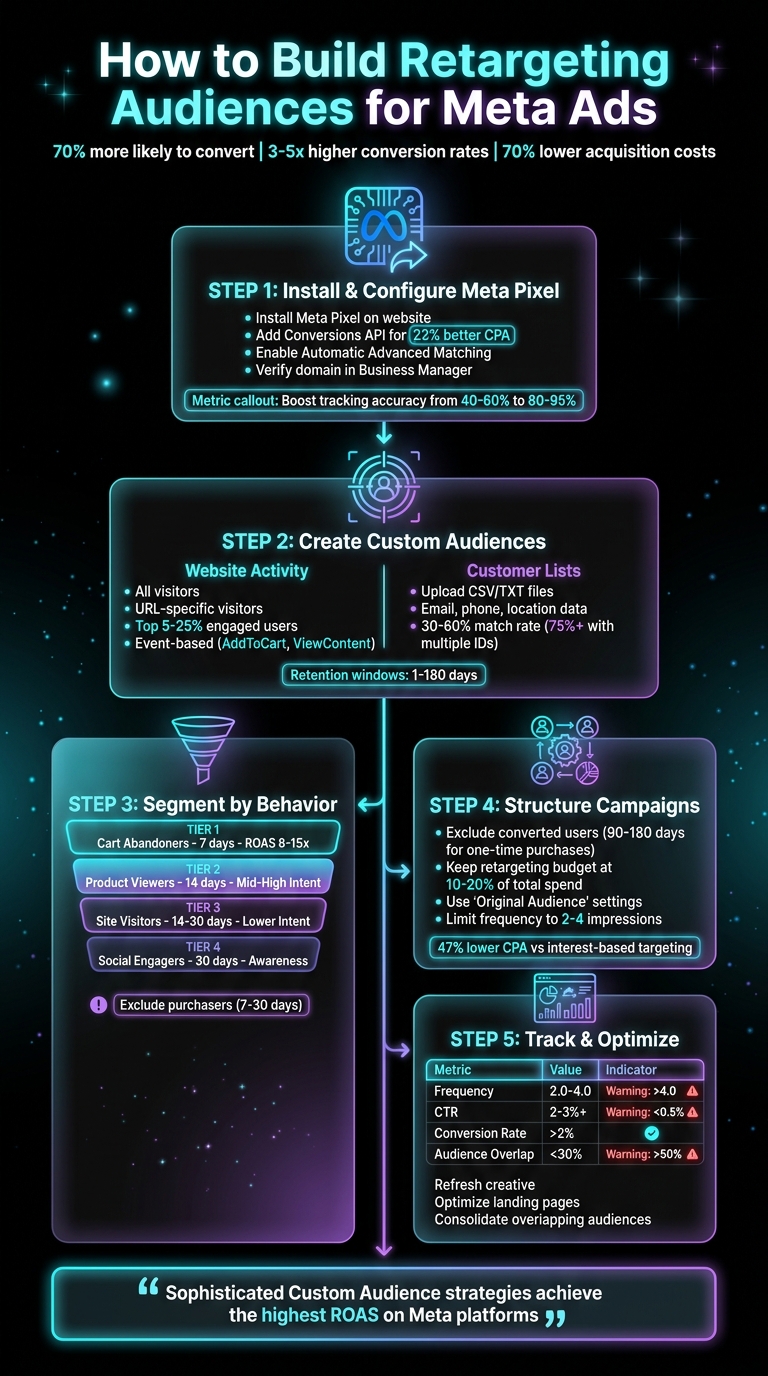
5-Step Process to Build High-Converting Meta Ads Retargeting Audiences
Step 1: Install and Configure Your Meta Pixel
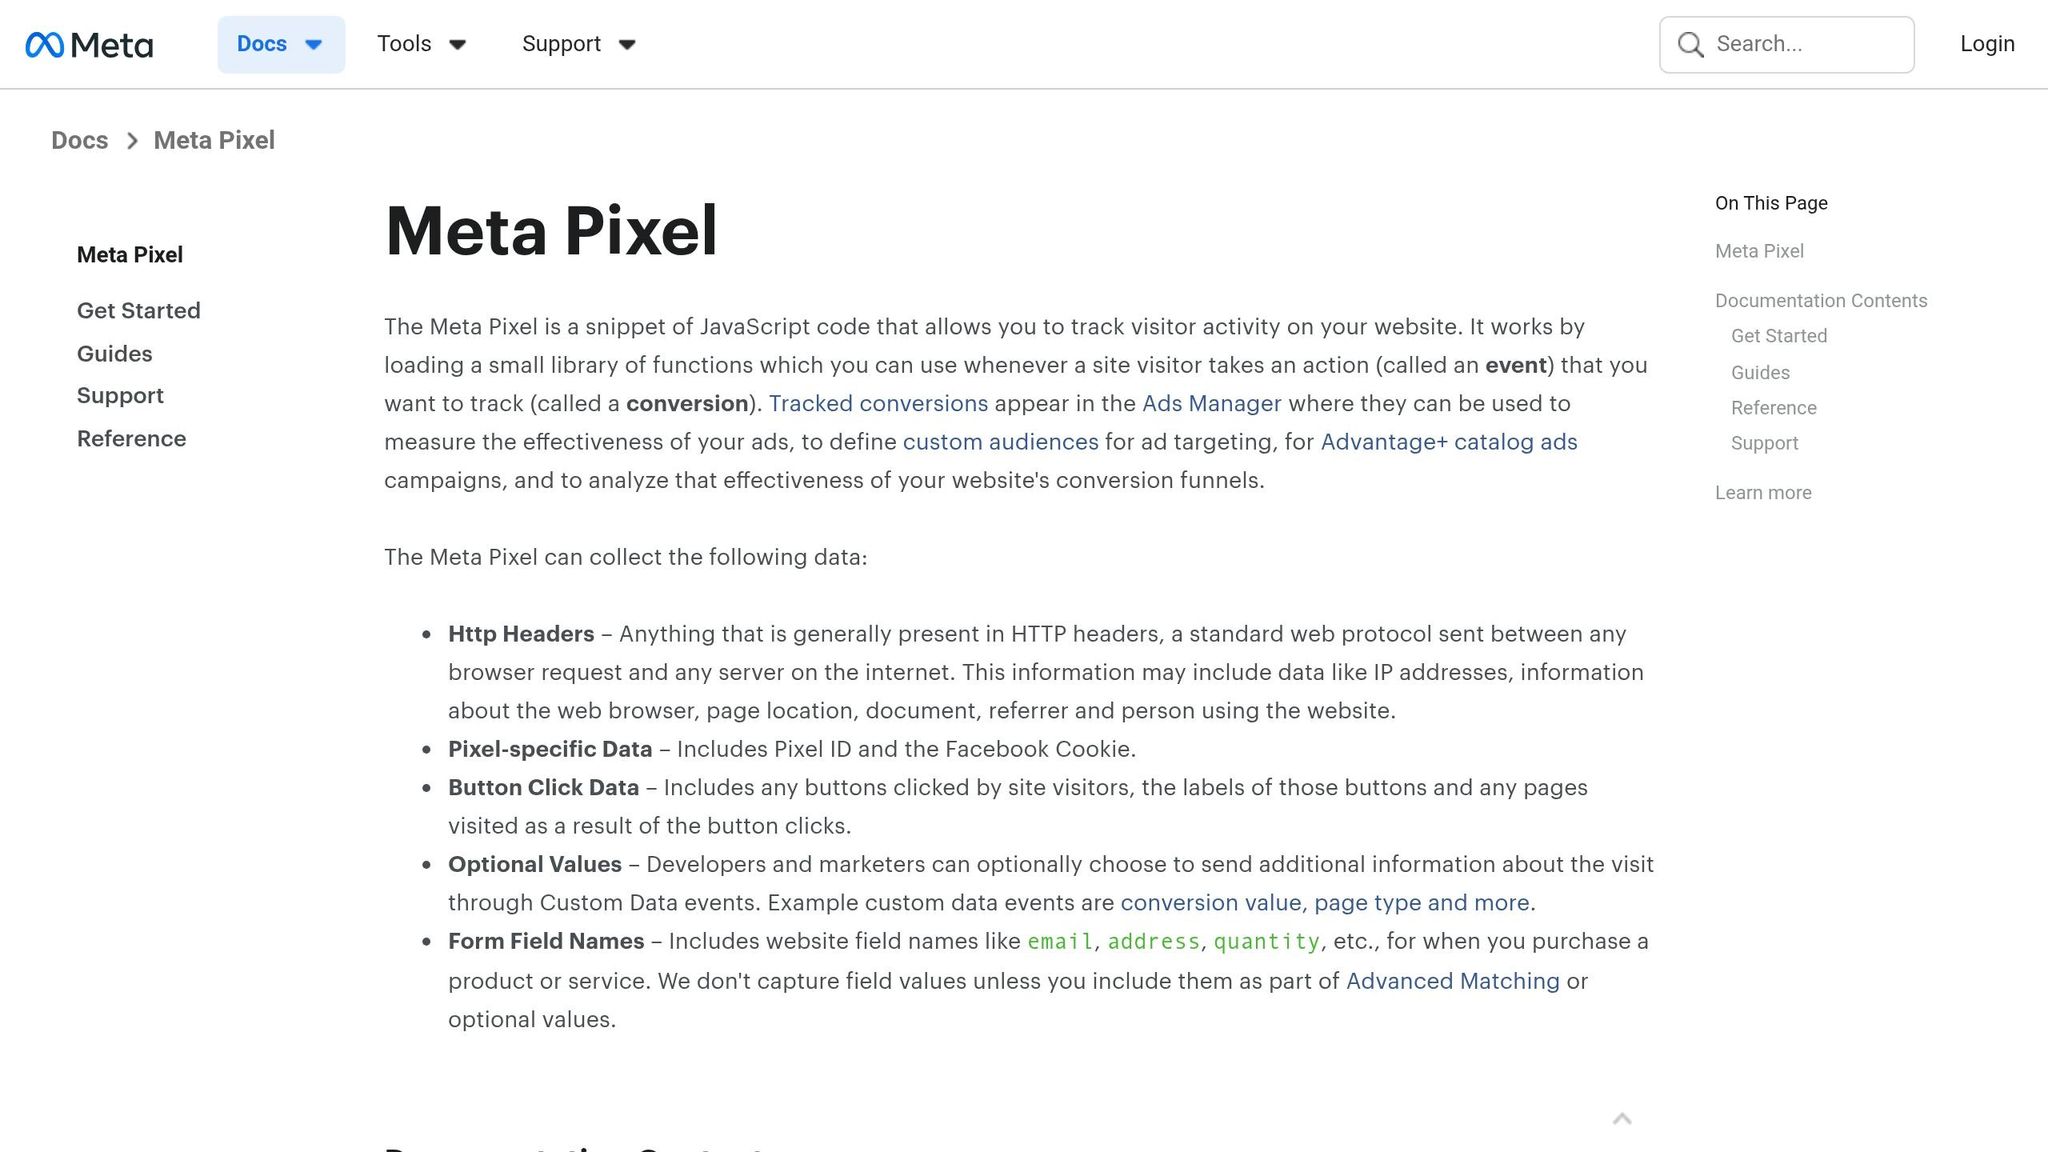
What the Meta Pixel Does and Why You Need It
The Meta Pixel is a powerful tool that tracks activity on your website and connects those actions to Facebook profiles using cookies. It's the backbone of retargeting strategies, capturing key user behaviors like viewing a product, adding items to a cart, or completing a purchase. Without the Pixel, identifying and targeting past visitors would be much harder.
Once it's up and running, the Pixel allows you to build Custom Audiences - groups of users segmented by their behavior, or build interest-based audiences to reach new prospects. For instance, you can create audiences like "Cart Abandoners" or "Past Purchasers". It tracks URLs, domains, devices, and specific actions, known as Standard Events, such as PageView, ViewContent, AddToCart, InitiateCheckout, and Purchase. Each event ties directly to a retargeting opportunity.
| Standard Event | Action Tracked | Retargeting Use Case |
|---|---|---|
PageView |
Every page load | Target all website visitors |
ViewContent |
Product or key page view | Target users interested in specific products |
AddToCart |
Item added to cart | Target users who abandoned their carts |
InitiateCheckout |
Checkout process started | Target high-intent users who dropped off at checkout |
Purchase |
Completed transaction | Exclude recent buyers or upsell related products |
Lead |
Form submission/sign-up | Target users who showed interest but didn't convert |
However, keep in mind that around 30–40% of internet users use ad blockers, which can stop the Pixel from functioning properly. To counter this, Meta suggests combining the Pixel with the Conversions API (CAPI). The API sends data directly from your server, bypassing browser restrictions. Using both tools together can improve cost per acquisition by 23% and recover 15–25% of missed conversion events.
How to Install and Test the Meta Pixel
To get started, head to Meta Events Manager and create your Pixel. Click "Connect Data Sources", choose "Web", and then select "Meta Pixel." Give it a name that aligns with your business and enter your website URL to generate a unique Pixel ID.
For manual setup, copy the Pixel code and paste it into your website's <head> tag on every page you want to track. If you're using a platform like Shopify, Wix, WordPress, or WooCommerce, simply enter your Pixel ID in the platform's settings. For those using Google Tag Manager (GTM), select the "Meta Pixel" tag template, input your Pixel ID, and set the trigger to "All Pages".
Once installed, use the Meta Pixel Helper browser extension or the Test Events tool to confirm everything is working correctly. The Pixel Helper will show green checkmarks when events fire as expected. In Events Manager, you should see a PageView event appear after loading a tracked page. If you're using both the Pixel and CAPI, look for a link icon in Test Events to ensure deduplication is functioning properly.
To maximize accuracy, enable Automatic Advanced Matching. This feature uses hashed customer data, like email addresses or phone numbers, to improve match rates. Additionally, verify your domain in Business Manager by uploading a DNS TXT record or an HTML file. This step is necessary for setting up Aggregated Event Measurement, which is critical for tracking iOS users.
"Accurate conversion tracking is the foundation of profitable Meta advertising." - Benly.ai
Finally, keep an eye on your Event Match Quality (EMQ) score in Events Manager. This score, ranging from 0 to 10, measures how well Meta matches website events to user profiles. Aim for a score of 6 or higher by passing extra parameters like hashed emails or cities. Combining a properly configured Pixel with CAPI can boost tracking accuracy from 40–60% (browser-only) to 80–95%. Accurate tracking is key to running effective retargeting campaigns.
Once your Pixel is installed and verified, you'll be ready to start building Custom Audiences with the data it collects.
Put the playbook to work
Apply this playbook to your page
Paste your website and the Lab will turn the strategy you are reading into a ready-to-test ads.
Free to try No prompt writing
Facebook Ads Retargeting - A Complete Guide for Small Businesses
Step 2: Create Custom Audiences from Pixel Data
Once your Meta Pixel is up and running, you can use the data it collects to craft highly targeted Custom Audiences.
Build Audiences from Website Activity
With your Meta Pixel tracking user interactions, you can create Custom Audiences that reflect specific behaviors. Head to Ads Manager, navigate to Audiences, click Create Audience, and choose Custom Audience. From there, select Website as your data source to tap into your Pixel insights.
You have several options for defining these audiences. While you can target all website visitors, the real magic lies in segmenting users based on their actions. For instance, you could focus on people who visited particular URLs (like pages containing "shoes") or prioritize visitors who rank in the top 5%, 10%, or 25% by engagement.
Another effective method is leveraging Pixel Standard Events for more refined targeting. For example, someone who triggers an AddToCart event is likely more interested in your product than a casual browser. Even better, a visitor who initiates checkout is closer to making a purchase.
"Custom Audiences are the foundation of effective Meta Ads targeting, enabling you to reach people who already know your brand for 2-5x higher conversion rates."
To maximize results, align your audience definitions with user intent. For example, tailor messaging to someone who viewed your pricing page differently than someone who only read a blog post.
Once you've set up audiences based on website activity, you can expand your reach by incorporating customer data.
Upload Customer Lists for Retargeting
Another way to create Custom Audiences is by uploading your customer data. When building a new Custom Audience, select Customer List instead of Website.
Prepare your data as a CSV or TXT file with identifiers like email addresses, phone numbers, first and last names, city, state, zip code, and country. To improve match rates, normalize the data - convert emails to lowercase and remove any formatting from phone numbers.
Meta uses SHA256 hashing to secure your data locally before matching it to Facebook or Instagram accounts. Match rates typically range from 30% to 60%, but including multiple identifiers can push that number above 75%.
Keep in mind, customer lists are static, meaning they won’t update automatically. To keep them effective, refresh your lists weekly or monthly. Their static nature also makes them ideal for specific use cases, like creating exclusion audiences (e.g., past purchasers) or building Lookalike Audiences to find new, similar prospects.
With both dynamic Pixel-based audiences and static customer lists in place, the next step is to fine-tune your approach by choosing the right time window.
Choose the Right Time Window for Your Audiences
Selecting the right retention window can significantly boost your retargeting results. Meta allows you to set lookback periods ranging from 1 to 180 days for website audiences. The best choice depends on user intent and your sales cycle. You should also align these windows with your ad scheduling strategy to ensure you reach users when they are most likely to engage.
For high-intent actions, like cart abandonment, use a short window of 1–7 days. These users are close to converting, so retarget them quickly with urgency-driven messages or special offers. This strategy can deliver a ROAS of 8–15x. A 14-day window works well for re-engaging users who viewed specific products, keeping their interest alive.
For mid-funnel actions, like pricing page visits or checkout initiations, a 30-day window allows time to address objections or provide additional social proof. Meanwhile, for awareness-stage audiences, like blog readers, a 60-day window gives you the opportunity to nurture their interest over time.
Lastly, always create a 180-day Past Purchasers audience. Use it as an exclusion in acquisition campaigns to avoid wasting ad spend on users who have already converted and reduce your CAC.
Step 3: Segment Audiences by User Behavior and Funnel Position
Once you've created Custom Audiences using pixel data, the next move is to refine your approach by dividing those audiences into smaller, more specific groups. Why? Because tailoring your messaging to match where users are in their purchase journey can make all the difference. For instance, someone who added an item to their cart is much closer to purchasing than someone who simply liked a social post. Treating these groups the same could waste ad spend and miss opportunities.
Define Your Core Audience Segments
Picture your audience in four distinct tiers, organized by how close they are to making a purchase:
- Tier 1: Cart abandoners – These are users who added items to their cart within the last 7 days but didn't check out. They’re your highest-priority group and can deliver impressive returns, with ROAS often reaching 8–15x when targeted quickly.
- Tier 2: Product viewers – These users looked at specific products over the past 14 days. They’re interested but may need a little more persuasion to commit.
- Tier 3: Site visitors – General visitors who browsed your homepage or category pages in the last 14–30 days. Their intent is lower, but they’ve shown curiosity about your brand.
- Tier 4: Social engagers – These users interacted with your social media content (likes, comments, or video views) in the past 30 days but haven’t visited your site yet. They’re at the awareness stage.
To avoid wasting ad spend and overwhelming recent buyers, exclude anyone who made a purchase within the last 7–30 days. Keeping your segments organized is crucial, so use clear naming conventions like WCA_CartAbandoners_7d_ExclPurchasers_Apr2026.
| Tier | Audience Type | Retention Window | Intent Level |
|---|---|---|---|
| 1 | Cart Abandoners | 7 Days | Highest |
| 2 | Product Viewers | 14 Days | Mid-High |
| 3 | Site Visitors | 14–30 Days | Lower |
| 4 | Social Engagers | 30 Days | Awareness |
Match Ad Messaging to Each Segment
The key to effective retargeting is customizing your ads for each group. Here’s how to approach it:
- Cart abandoners: These users are already familiar with your products, so focus on overcoming their final hesitations. Use ads featuring customer reviews, money-back guarantees, or limited-time discounts to nudge them toward completing their purchase.
- Product viewers: These users need more information to build confidence. Ads with "how-to" videos, customer testimonials, or comparison guides work well to address their questions and move them closer to buying.
- Site visitors: For this group, focus on building trust and showcasing your brand’s personality. Ads highlighting your founder’s story, best-sellers, or what makes your products stand out can help them connect with your brand.
- Social engagers: These users need a reason to visit your site. Use discovery-focused ads with eye-catching hooks or generate hundreds of ads on autopilot to encourage them to explore your offerings.
"Retargeting isn't about reminding people what they looked at. It's about giving them a reason to come back and buy. The product reminder is the least persuasive ad in your retargeting stack because the user has already seen the product and chose not to buy."
– 27Five
When campaigns are built using well-structured Custom Audiences, they can reduce the cost per acquisition by 47% compared to interest-based targeting alone. This level of segmentation not only improves efficiency but also ensures you’re excluding converted users, setting you up for the next step. To maintain this efficiency as you grow, implement a creative scaling system to ensure your best-performing assets reach these refined audiences.
Step 4: Structure Campaigns and Exclude Converted Users
To make the most of your ad spend, it’s essential to structure your campaigns in a way that avoids targeting customers who’ve already converted. By focusing only on potential buyers, you can ensure your budget is being used effectively.
Exclude Existing Customers from Retargeting Ads
When working with segmented audience tiers, it’s important to exclude converted users so your ads focus solely on potential customers. The simplest way to do this is by using your existing purchaser lists and applying exclusions at the Ad Set level. In the "Audience" section of your ad set, click the "Exclude" button and select your purchaser list. You can create these exclusion audiences either by using Meta Pixel "Purchase" events or by uploading customer lists directly from your CRM in a CSV format.
Tailor your exclusion windows based on the type of product you’re selling. For one-time purchases like furniture or electronics, exclude buyers for 90–180 days. For consumable goods with regular reorder cycles, align the exclusion period with the average time between purchases. For instance, if customers typically reorder every 60 days, set the exclusion window to match that timeframe. In general, a "Purchasers - 180 days" audience works well for most eCommerce businesses, keeping your ads focused on users who haven’t yet converted.
Don’t forget to also exclude recent purchasers from your prospecting campaigns. This prevents unnecessary spending on users who are already customers. Use clear, consistent naming conventions for your exclusion lists - like Purchasers_180d_Apr2026 - to simplify cross-campaign management.
Organize Ad Sets for Maximum Efficiency
Once exclusions are in place, it’s time to structure your campaigns for optimal performance. There are two main ways to organize retargeting campaigns: the stacked approach or segmentation by intent.
- Stacked Approach: This method combines all warm Custom Audiences - such as website visitors, social media engagers, and video viewers - into a single ad set. Meta’s algorithm thrives on larger data sets, so this approach works well with Campaign Budget Optimization (CBO).
- Segmented Approach: This strategy separates audiences into distinct ad sets based on their level of intent, such as cart abandoners, product viewers, or general site visitors. It’s particularly effective if each ad set has at least 50 conversion events per week, allowing for tailored messaging at every stage.
Regardless of the approach you choose, apply the Exclusion Principle consistently. For example, ensure that users in higher-intent tiers (like cart abandoners) are excluded from lower-intent ad sets (like general site visitors).
To avoid over-saturating your warm audiences, limit your retargeting budget to 10–20% of your total daily Meta ad spend. Manage retargeting campaigns manually for better precision and switch to "Original Audience" settings instead of Advantage+ Audiences to maintain control over who sees your ads.
Lastly, keep an eye on ad frequency. If users are seeing your ads more than 10 times per week, either reduce the budget or expand your audience.
Step 5: Track Performance and Adjust Your Campaigns
Once your campaigns are live, it's time to keep a close eye on performance. By tracking the right metrics, you can refine your approach and turn potential into profit. A well-structured campaign isn't a "set it and forget it" deal - continuous monitoring and adjustments are key.
Monitor These Key Retargeting Metrics
To ensure your retargeting efforts are hitting the mark, focus on these metrics:
- Frequency: This tracks how often your ads are shown to the same user. Ideally, you want this to stay between 2.0 and 4.0 impressions. If it goes above 4.0 and your click-through rate (CTR) starts dropping, it's a sign of ad fatigue. Remember the audience segmentation from Step 3? These metrics help confirm whether your tailored messages are landing effectively.
- Click-Through Rate (CTR): A strong CTR shows that your ads resonate with your audience. For direct response campaigns, aim for a CTR of 2–3% or higher. If your CTR is below 0.5%, it could mean your ad creative isn't connecting with your audience. For context, the median CTR for Facebook Ads in November 2024 was 1.77%.
- Conversion Rate: This measures how many people who click on your ad complete the desired action. A good retargeting campaign should deliver conversion rates above 2%. If your CTR is high but conversions are low, the issue likely lies in the post-click experience, not the ad itself.
- Cost Per Acquisition (CPA): This tells you how much you're spending to acquire each customer. Campaigns using custom audiences often see a 47% lower CPA compared to interest-based targeting.
- Return on Ad Spend (ROAS): This is the ultimate profitability metric. Divide your revenue by your ad spend to calculate it. For example, if you spend $1,000 and earn $4,000, your ROAS is 4:1.
- Audience Overlap: Use Meta's built-in tool to check if the same users are in multiple ad sets. If more than 30% of your audience overlaps, you're essentially bidding against yourself, which drives up costs. Keep overlap below 30% by consolidating audiences or refining exclusions.
| Metric | Healthy Benchmark | Warning Sign |
|---|---|---|
| Frequency | 2.0 – 4.0 | Above 4.0 with declining CTR |
| CTR | 2% – 3%+ | Under 0.5% |
| Conversion Rate | > 2% | Declining over time |
| Audience Overlap | < 30% | Over 50% |
Make Data-Driven Campaign Improvements
When your frequency exceeds 4.0 and CTR starts to dip, it's time to shake things up. Refresh your ad creative by A/B testing new visuals, rewriting copy, or trying sequential messaging that unfolds over multiple impressions.
If your ads generate clicks but not conversions, focus on the landing page. A slow-loading page - especially one with a mobile PageSpeed score below 50 - can cause users to leave before even engaging with your content. Make sure your landing page delivers on what your ad promised and provides a seamless experience.
For smaller audiences (fewer than 1,000 people), consider extending your retention window from 7 days to 30 or even 60 days. This gives Meta's algorithm more data to work with and helps stabilize delivery.
When audience overlap exceeds 30%, consolidate overlapping segments into a single ad set. This reduces internal competition and allows the algorithm to optimize more effectively.
If an ad set struggles to reach 50 conversion events per week, it may remain stuck in the learning phase, leading to inconsistent performance. In such cases, optimize for a higher-funnel event like "Add to Cart" to provide the algorithm with more data to work with.
Take a close look at your Ad Relevance Diagnostics, which include Quality, Engagement, and Conversion Rate rankings. If any of these are marked "Below Average", the problem likely lies in your ad creative or landing page alignment - not your budget. Fix these issues directly rather than simply increasing your spend.
For audiences with high engagement but low conversions, test stronger incentives. Limited-time discounts, free shipping offers, or money-back guarantees can help nudge hesitant buyers. Tailor these offers to the audience segment - cart abandoners may respond well to urgency, while product viewers might need more education or social proof.
As outlined in Step 4, keep your retargeting budget to around 10% of your total ad spend to avoid over-saturation. To measure the true impact of your retargeting efforts, set up holdout groups by excluding 10–15% of your audience from seeing ads. This helps you compare the incremental lift against Meta's reported numbers.
Conclusion
Once you've set up, segmented, and structured your campaigns, it's time to put everything into action and make the most of your efforts.
Creating effective retargeting audiences on Meta starts with the essentials: installing the Meta Pixel and Conversions API. From there, it’s about building and carefully segmenting Custom Audiences, structuring campaigns thoughtfully, and consistently monitoring performance and optimizing budget allocation to fine-tune your approach.
The payoff can be impressive. For example, targeting high-intent groups like 7-day cart abandoners can yield a return on ad spend (ROAS) ranging between 8x and 15x.
"The advertisers who achieve the highest ROAS on Meta platforms typically have sophisticated Custom Audience strategies at the core of their campaigns." - Gaultier D'Acunto, Co-founder, Benly
It’s worth remembering: most visitors to your site won’t convert right away. Retargeting gives you that crucial second chance to engage with warm prospects who are already familiar with your brand. By leveraging first-party data, smart audience segmentation, and careful exclusions, you can turn casual browsers into loyal customers - all while keeping your acquisition costs manageable.
Start with the basics: ensure your tracking is accurate, build strong core audiences, and experiment with tailored messaging for each segment. Let the data guide you. As you identify what works, you can refine and expand your strategy to maximize results.
FAQs
What retention windows should I use for each retargeting audience?
When setting up Meta retargeting audiences, it's important to choose the right retention window based on user behavior and campaign objectives:
- 7-30 days: Ideal for targeting high-intent actions, such as visitors who are close to making a purchase.
- 60-180 days: Best suited for broader awareness campaigns or when immediate retargeting isn't critical.
Meta automatically refreshes audiences within a 30-180 day range. However, syncing new events resets the retention timeframe, allowing you to extend retargeting efforts. Tailor your strategy by analyzing audience behavior and aligning it with your campaign goals.
How do I prevent audience overlap and bidding against myself?
To make sure your Meta Ads campaigns run smoothly without competing against yourself, take advantage of Meta's audience overlap tool. This handy feature lets you compare up to five audiences at once, helping you keep overlap between ad sets below 30%.
By regularly checking and refining overlapping audiences, you can focus on targeting distinct groups. The result? Lower costs, reduced internal competition, and better overall campaign performance.
What should I do if my Meta Pixel data looks incomplete or inaccurate?
If your Meta Pixel data appears to be missing information or seems off, start by verifying that the pixel is properly installed on your website and tracking the correct events. Make sure the code is placed on all relevant pages and doesn’t contain any errors. It’s also a good idea to routinely monitor the pixel’s activity through Ads Manager. If the problem persists, consider re-installing the pixel or consult Meta’s instructions for advanced matching and tag setup to ensure better accuracy.
Your next ad batch starts here
Finish with a ready-to-test ad batch
Paste your website to generate static creatives. Drop the link → get ads in about 90 seconds → upload them to Meta → scale.
Free to try No prompt writing