Build a Creative Testing Batch From Your Product Page in 15 Minutes
Turn the strategy into creatives
Create ready-to-test Meta ads for your product
Paste your product page. ADEN'S LAB turns the offer, audience, and positioning into complete ad concepts with images, headlines, and copy.
No design brief or prompt writing required.
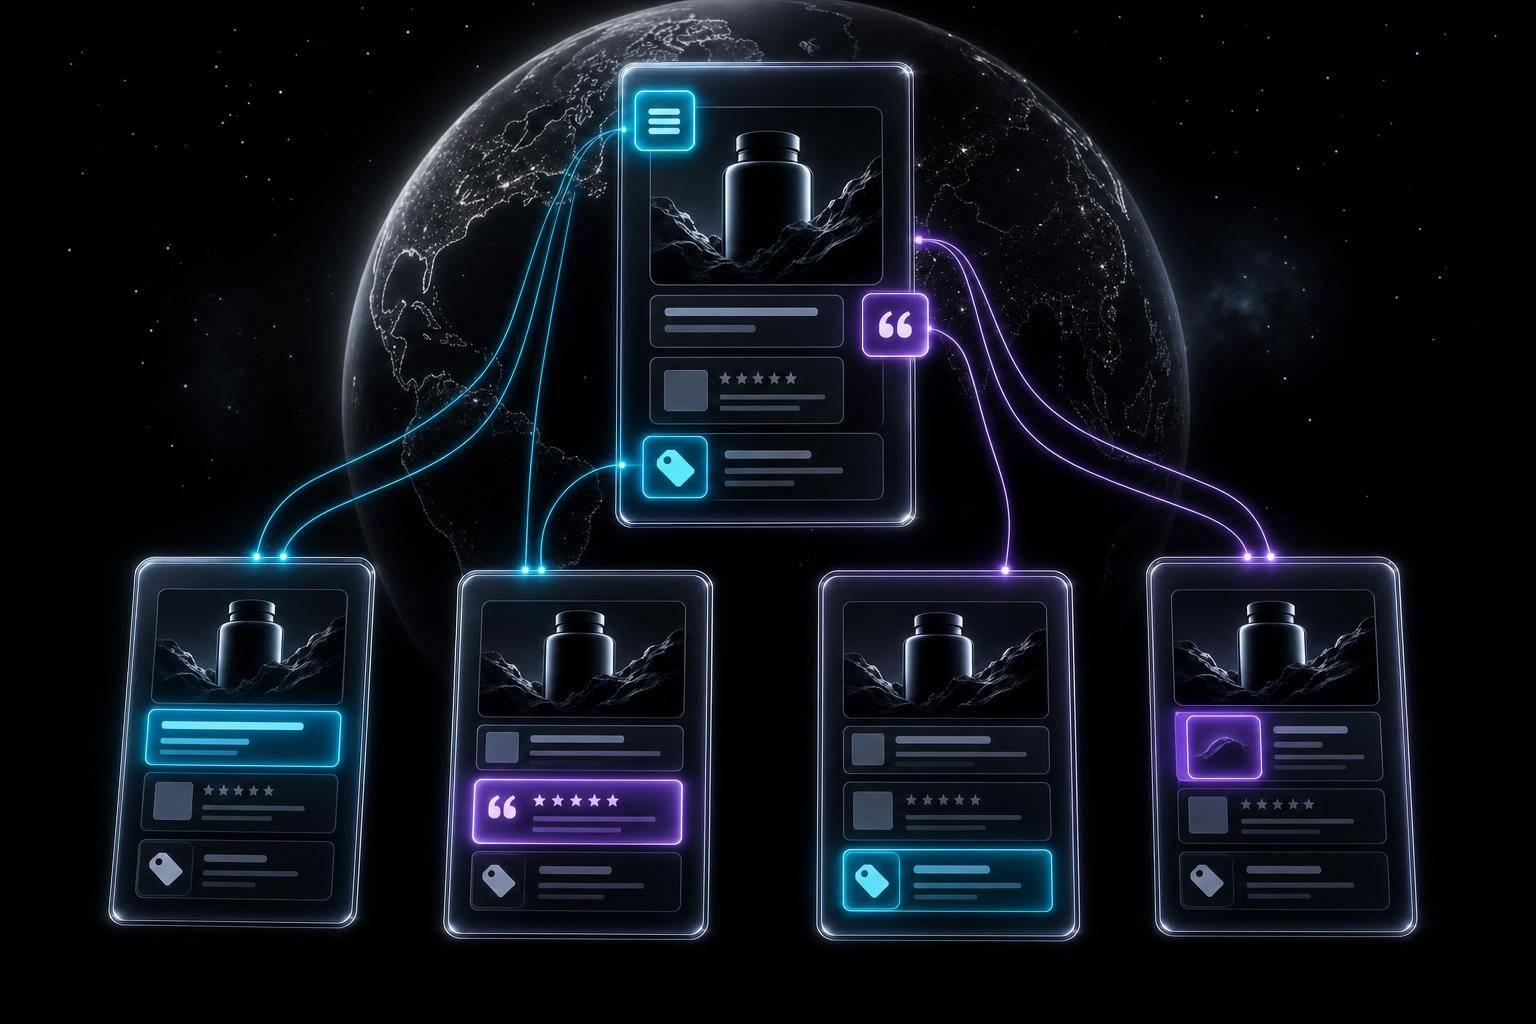
You can turn one product page into 3–5 Meta ads in about 15 minutes if you pull the right parts and test just one thing at a time. I’d start with the page’s main promise, proof, offer, and images, then turn those into static ads in 1:1, 4:5, and 9:16 for Feed, Stories, and Reels.
Here’s the short version:
- I use the headline, bullets, reviews, price, and guarantee as ad inputs
- I sort the message into offer, benefit, and pain point
- I build 3–5 ads around one test variable, like angle or hook
- I keep the audience, budget, placements, and URL the same
- I judge the batch by CPA or ROAS, not just CTR
- I label each file by angle + hook + format so results are easy to read
A few numbers matter here: static ads are faster to make than video, most test batches should run for about 3–7 days, and proof like 4.8/5 stars from 1,200+ buyers can double as both copy and image text.
My take: this method works because it cuts guesswork. Instead of writing ads from zero, I reuse what the product page already says and shows. That keeps the ad and landing page aligned, which can help conversion rate and cut wasted spend.
If I had to boil the process down even more, it would be this:
- Pull the best page copy and images
- Pick one thing to test
- Build a small static batch
- Launch with a fixed setup
- Review the winner and make the next batch from it
This article is a simple playbook for doing exactly that without overbuilding the first round.
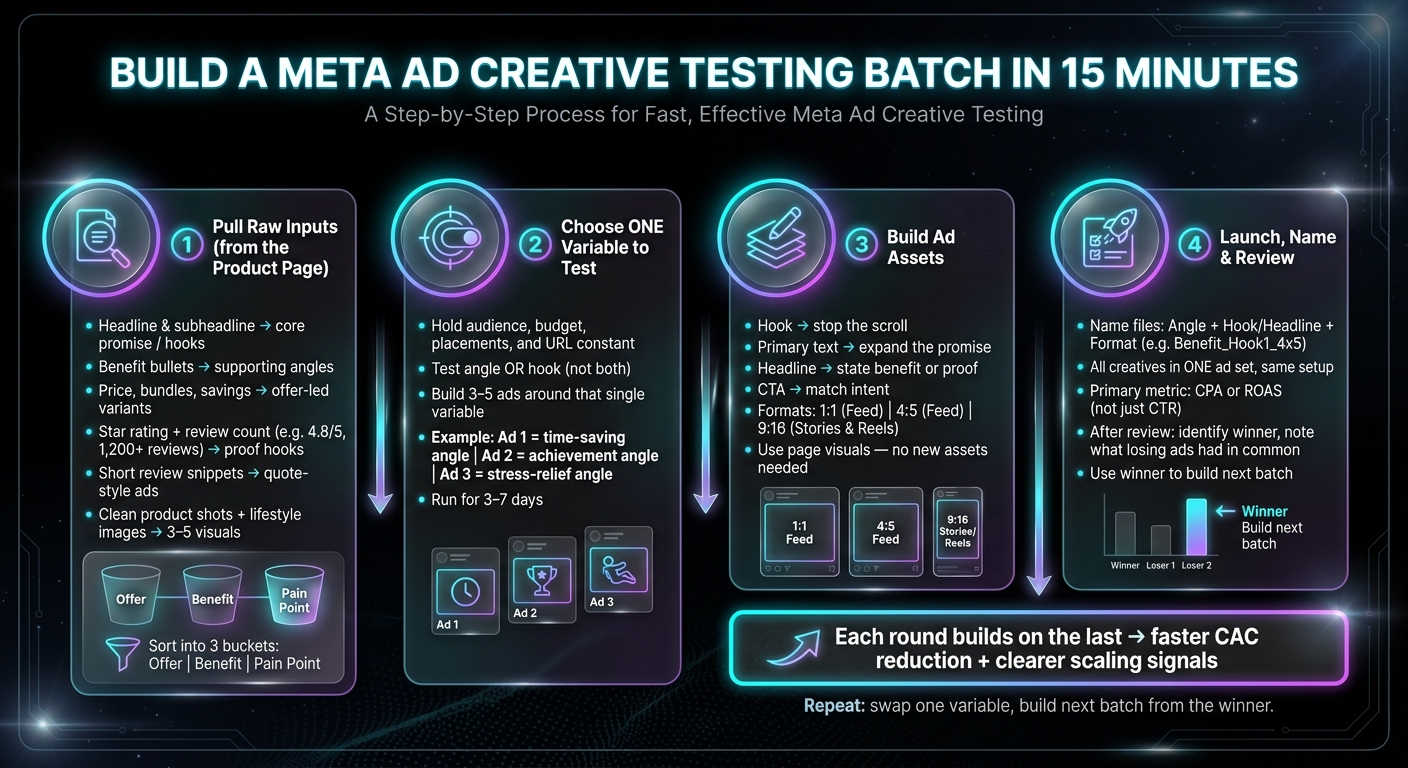
How to Build a Meta Ad Creative Testing Batch in 15 Minutes
Copy This Meta Ads Testing Strategy for Better Results
sbb-itb-628c49f
Step 1: Review the Product Page and Pull the Raw Inputs
Before you write a single line of ad copy, take a few minutes to read the product page from top to bottom. Your job here is simple: pull the page’s best lines, proof points, and images into one place so you’re not making things up later. Then group what you found into test angles.
Extract the Offer, Benefit, and Pain-Point Language
Start with the headline and subheadline. That’s usually where the core promise shows up most clearly, like Sleep better in 7 nights or your money back. Those lines are often your first hooks and headline tests.
Then move to the benefit bullets. This is where you’ll usually find your backup angles: clear outcomes, use cases, and features you can turn into supporting lines in the primary text or use in carousel cards.
As you go, sort each line into three buckets:
- Offer: what the customer gets and what it costs
- Benefit: a clear outcome, like lose up to 10 lbs in 30 days
- Pain point: the problem the buyer wants to fix, like tired of waking up at 3 a.m.
Each bucket can become its own test angle. Start with the angle that feels the most specific and shows up the most across the page. If the hero copy, bullets, and testimonials all hammer the same idea, that’s usually a strong signal.
Also grab any conversion language you see: price in USD, bundle savings, free shipping thresholds, urgency lines like offer ends Sunday, and guarantee wording like 30-day money-back guarantee. These often turn into your first offer-led ad variants.
Pull Proof Points and Visuals You Can Reuse Right Away
Next, pull every trust signal you can see on the page: star rating, review count, short review snippets, certifications, and guarantee badges. A line like 4.8/5 from 1,200+ customers can do a lot of work. It can sit on an image overlay, become a headline test, or stand alone as a hook.
Short review snippets are useful too, especially when they mention a clear result. Something like finally stopped waking up at 3 a.m. works well in quote-style static ads or as a first-line hook.
For visuals, focus on two types:
- Clean product shots with open space for text
- Lifestyle images that show the product in a believable use case with a clear mood
Product cutouts are easy to use in simple static ads with a price or CTA overlay. Lifestyle shots are better for problem-solution angles. Pick 3–5 strong images that fit these rules. That’s enough to build a full static batch without making new assets.
| Page Element | What to Capture | Ad Use |
|---|---|---|
| Headline / subheadline | Core promise, main benefit | Hook, primary text opener, headline |
| Benefit bullets | Specific outcomes, features | Supporting lines, carousel frames, on-image copy |
| Price, bundles, savings | USD amounts, per-unit cost, discount % | Offer-focused headlines, value-stack angles |
| Guarantee / risk-reversal | Exact phrasing, e.g. 30-day money-back | Trust-badge overlays, CTA combos |
| Urgency copy | Limited-time language, low-stock notices | Retargeting hooks, conversion lines |
| Star rating + review count | Exact number, e.g. 4.8/5, 1,200+ reviews | Image overlays, headline variants, proof hooks |
| Short review snippets | 1–2 sentences with concrete results | Quote-style ads, UGC-style hooks |
| Certifications / badges | Made in USA, Doctor-recommended, etc. | Credibility-focused angles, overlay graphics |
| Clean product shots | Well-lit, open space for text, multiple angles | Simple static ads with CTA or price overlay |
| Lifestyle images | In-use context, emotional tone, demographic fit | Problem-solution angles, Stories/Reels formats |
Step 2: Choose One Variable and Build the Batch Structure
Use the raw language and visuals from Step 1 to test one variable at a time. Keep the audience, placements, budget, bid strategy, and URL the same across the batch. Then, once that test variable is set, turn it into copy, visuals, and prompts in Step 3.
Pick One Variable to Test for a Cleaner Read
The rule is straightforward: choose one variable and hold everything else steady.
If the product page is new or the message still feels fuzzy, start with angle or hook tests. Angles shape the message. Hooks handle the opening line.
Once one angle or hook clearly pulls ahead, say by driving a lower CPA over a 3–7 day window, move on to headline or CTA tests. Headlines can improve click-through. CTAs affect that last nudge to act. Those come later, once you know the core message works.
Then turn that variable into a small batch.
Use a Simple 3–5 Creative Batch Format
Keep the batch tight: 3–5 ads in one campaign or ad set, using one evaluation window. Let the batch run long enough to produce a usable signal, which is often 3–7 days.
Here’s what an angle-test batch might look like for a $49/month productivity app:
- Ad 1 leads with "Get 5 hours back every week" - a time-saving angle
- Ad 2 leads with "Hit your goals 2x faster" - an achievement angle
- Ad 3 leads with "Feel less overwhelmed at work" - a stress-relief angle
Keep the hero image, offer, and CTA the same across all three ads. Then use the ad with the lowest CPA as the baseline for the next round.
Use one primary metric to choose the winner: CPA or ROAS. Look at CTR and CPC to help explain what happened, not to decide which ad wins.
Step 3 turns the winning variable into ad assets.
Step 3: Turn Page Elements Into Ad Copy, Visuals, and Prompts
Once the Step 2 variable is locked, turn the page copy and visuals into ad assets you can launch right away. Use the winning angle from Step 2 as the starting point for every asset in this batch.
Write Hooks, Primary Text, Headlines, and CTA Variants
Each part of the ad has a job.
- Hook: stop the scroll
- Primary text: expand the promise
- Headline: state the main benefit or proof
- CTA: match intent
Keep everything else fixed. Only swap the single variable you picked in Step 2. That’s how you keep the test clean and avoid muddy results.
Map Source Material to Finished Ad Assets
The table below shows how to go from a raw page element to a launch-ready ad component without extra guesswork. Each row is a separate ad concept built from a different part of the same product page.
| Page Copy Source | Angle | Primary Text | Headline | Proof | CTA | Visual |
|---|---|---|---|---|---|---|
| Hero section benefit | Direct solution | Benefit-led: how [Product] solves [Problem] | The #1 way to [Benefit] | 10k+ Happy Customers | Shop Now | Product in use (lifestyle) |
| Customer review | Social proof | Voice-of-customer language describing the experience | Why 500+ people gave us 5 stars | Rated 4.9/5 stars | Get Yours | Customer quote overlaid on product image |
| Features list | Utility/function | Feature-focused: Built for [Specific Use] | The last [Category] you'll ever need | Certification or guarantee badge | Order Today | Close-up of key product feature |
| FAQ or pain-point section | Objection handling | Empathy-led: Tired of [Pain Point]? | Stop [Problem] for good | Expert/Lab Certified | Learn More | Text-heavy overlay on a clean product shot |
Each row becomes one ad. The source column shows where to look on the page. The visual column shows which image to pull. You’re not starting from zero here. You’re turning page elements into ad-ready pieces.
Once the batch is built, package it for launch in Step 4.
Build Static Ad Concepts and Prompts From Existing Page Visuals
In many cases, the images you need are already sitting on the product page. Match each asset to the right page source, then keep the test variable isolated.
Start by matching the image to the angle. A clean product shot usually fits offer-led and price-led messaging best. A lifestyle image tends to work better for aspiration, identity, or use-case angles. From there, add light overlay text tied to the hook you chose, one proof point, and a CTA cue if the format allows it.
For a static concept built from a pain-first angle, use the product hero image, overlay a hook centered on the main problem, add a proof badge from page copy, keep the layout minimal, and export a 4:5 static feed ad.
Package the batch, label each asset clearly, and move to launch and review in Step 4.
Step 4: Package, Launch, and Review the Batch
Name Assets by Angle, Hook, and Format for Easier Analysis
Once the batch is ready, label each file before you upload it. Give every file a short, consistent name that shows what you're testing. A format like Benefit_Hook1_4x5 or Proof_Headline2_Square works well.
Each name should include:
- Angle
- Hook or headline variant
- Format
That way, every asset tells you what it is at a glance.
If FreeShipping_Hook1_4x5 beats FreeShipping_Hook2_4x5, you can see right away that the hook caused the gap, not the format or the audience. Without a naming system like this, Ads Manager turns into a blur of file names that don't tell you much.
Launch With a Fixed Setup and a Short Review Window
After the files are named, launch them in one controlled test. Put all 3–5 creatives in a single ad set with the same audience, budget, placements, landing page, and optimization event. The ONLY thing that should change is the test variable.
Pick your main metric before launch: CPA, ROAS, CTR, or conversion rate. For higher-spend accounts, CPA and ROAS usually give the clearest read. For lower-spend accounts, early CTR can act as a signal while conversion data starts to come in.
Set the review window based on spend pace, not calendar days. And don't restart the test early just because one ad jumps out in the first few hours. Early results can fool you.
Conclusion: Use the Page You Already Have to Build the Next Batch Faster
After the review window ends, write down the result in one sentence for each creative. Track three things: which variable won, what the winning message said, and what the losing ads had in common - like weak contrast, generic claims, or unclear value.
Then use the winner to shape the next batch. If a pain-point hook beat a benefit hook, keep that angle and test a new visual treatment. If the proof line drove results, change how that proof is shown in the next round.
Each round builds on the one before it. Over time, that leads to faster CAC reduction and clearer scaling signals.
Use the page again, swap one variable, and build the next batch from the winner.
FAQs
What if my product page is weak?
If your product page feels a little flat, you don't need to rewrite everything by hand or sit around waiting for a full redesign. ADEN'S LAB can turn your existing product page into ad creative.
Just paste in your link, and it can generate ad assets in 90 seconds. It pulls angles, hooks, and visuals from your current page, so you can test messaging and scale performance without rebuilding your site.
How much budget should I use per batch?
There’s no fixed budget for testing a creative batch.
Set your spend based on your target return on investment. Then use early tests with your generated creative assets to check whether the messaging lands before you put more money behind it.
When should I move to video tests?
Move to video tests after you’ve validated your core messaging, hooks, and angles with batches of static ad creative.
Static testing helps you spot which primary text, headlines, and visual ideas click fastest and at a lower cost. That way, your video scripts and production can build on messaging that’s already proven to drive conversions and cut customer acquisition costs.
Create Ads That Print Money
Your competitors aren't waiting — why should you? Drop your product link → get scroll-stopping ads in 90 seconds.